There hasn't been a moment since then where I've walked down the stairway, or entered the room, that I haven't just enjoyed their simple navy shaker beauty. I don't know whether to give credit to Joanna Gaines or Jonathan Silver Scott, but the idea for navy cabinets for my room became imbedded in my brain sometime during my 2016 HGTV binge watching, and it was an idea I just couldn't shake. When Steve agreed with me on using navy, I was over the top excited. And I love these navy cabinets with every ounce of my home decor and color loving heart.

The fact that the wall relegated for the cabinet unit is fifteen feet long and the ceiling is 10 feet high gave me lots of working space. I decided to completely exploit the space and maximize it's utilitarianism: wall to wall, and very nearly floor to ceiling. Actual accessibility to the cabinet uppers combined with the necessity for some visual eye rest were the two overriding parameters that kept me from going all the way to the ceiling. Where the three center cabinets bump up a bit in height, I felt they also needed to bump out in depth. These slight changes give them more interest, I think, and make them more compelling to take in. Whereas I designed them in my mind as seven different cabinets placed all together, they actually were built as five upper units, and seven lower units, and that treatment ended up giving me more room in the uppers. Another delight at installation: they upgraded me at no charge to soft close drawer glides and soft close door hinges! No slamming drawers or doors for me! And you may notice that all the drawers fully extend, and they are each rated to hold 150#. Such bliss!

When the trailer pulled up at my house on the morning of March 10, it was a beautiful sight to behold! I was definitely like a kid at Christmas!! The men had never heard of scrapbooking and {wrongly} assumed these cabinets were for a man! Nope! All twenty-two drawers are for me! ;-) As the crew of four men carried them in and pieced them together, I marveled at the precision of the workmanship and the strength of these men to hoist up these heavy upper units onto the base units, and get them to line up together in such exact measures. To realize that these cabinet boxes were all crafted separately, and then fitted all together is something to really just contemplate. As a paper crafter, I have just a snip of an idea of the measuring and accuracy that had to occur to get them to all come together. I really could not stop watching the wall come together.


The cabinets were something to behold from the beginning, but when they were finally painted, I think my excitement went clear off the chart to pinch-me giddiness. Oh, don't get me wrong. I was losing my patience at how long it all was taking, and the stuff all over the house was driving me crazy! But I was seeing where I could BE in a few weeks, or even, as it has turned out, almost 12 weeks, and it was just enough to make me punch drunk with happiness! The symmetry is so aesthetically pleasing to me, and as I began to finally move things in during the first of April, the accuracy of all my months of measuring came to light, and my hours upon hours of dreaming and designing turned to a delightful and present reality.

It's good to have this delight to fall back on. During the past twelve weeks, I have sifted through so, so, so many piles that it's been non-stop sorting and organizing, which can get exhausting! My strategy was to bring everything back into the room in small bundles, and to work through - and touch - everything from those small bundles before putting it away. There were things that were purged to a "going away" pile, there were things that needed to be re-containerized, there were things that needed to be added into Evernote {this is a whole blog post on its own one day, and something I'm very passionate about!}, and there were a few things here and there that could go into their new home just as is. Bloody little fell into this last category!


Enough back story. Let's go see them! I'll show you all the uppers, and then we can walk through them.


My patterned paper is on the lower shelf of the same three units, because I access it more frequently than cardstock. It is in alphabetical order my manufacturer first, and then by collection name within that manufacturer. I use the discontinued Cropper Hopper thin paper folders and am so thankful to some friends that sent my way some of their abandoned ones! I did have to update my collection name paper dividers to restore order after my two year organizational "I'm moving and living in an apartment" hiatus. {This is a common theme that will play out over and over, cabinet drawer by cabinet drawer.} I also added manufacturer dividers the other day and I love this idea! I used more of the plastic school pocket folders, unfolded and cut length wise. I wish I had thought of it sooner. It gives me guidance on just where to head in this plethora of pretty paper to pull the collection I'm after. I can have all of these cabinet doors open to see it all together, or I can know which cabinet to go to based on a specific manufacturer or cardstock color I'm after. It's working perfectly!


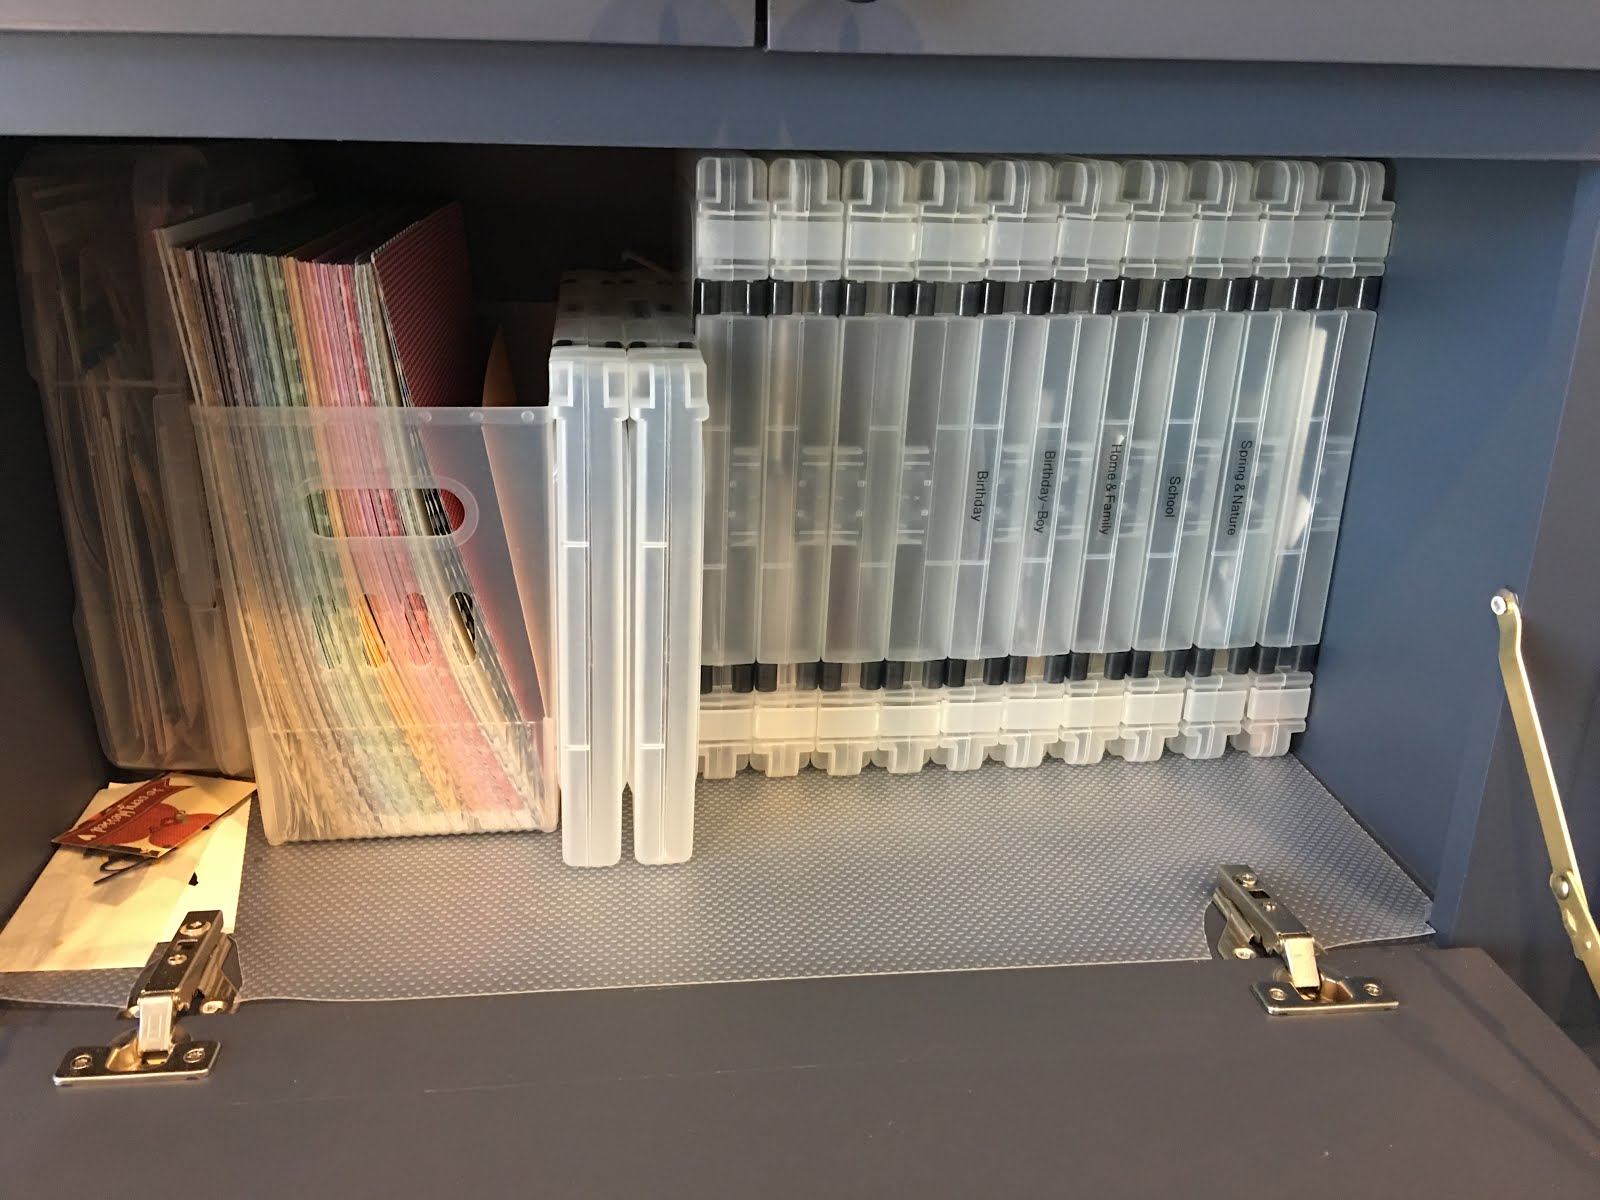
Let's look up above the paper, shall we? This space is great storage for items seldom needed or infrequently used. I can reach it with my small folding step stool, but it's not like I want to be hopping up on that all the time. {Mother gave me that little step stool one year for Christmas. Little did I know it would someday be perfect for Story Central!} It seemed like the perfect space for some archival items: memorabilia, duplicate or non-scrapped photos, and some odds and ends for projects. The left cabinet holds a stack of seven Iris Cases full of memorabilia and ephemera from our dozen years of Walt Disney World park trips and cruises. I have a bin labeled for each park and for Disney Springs, and I have one for cruises, and one for just general Disney items for specific trips. I love that I can stack seven cases! They are all fairly lightweight, so getting one out from the pile isn't too big of a deal. To their right, I have some more Iris Cases which hold various things, like seasonal punches that I don't need all the time, or excess enamel dots, etc. Isn't it Nirvana that the cabinet width accommodates TWO stacks of Iris Cases!? Good Math + Lots of Planning = Storage Space Bliss. {A decade of not being able to fit an Iris Case into an Expedit cubby will do that to a planner kind of gal!} ;-)

The center cabinet holds photos. These are photos that are "leftovers" from scrapping projects, or duplicates from the days of non-digi film. The clear cases on the right are Iris Media Cases that I picked up from The Container Store. In my Scrap Central set-up, I had these photos stored in the Stacy Julian recommended "Category Drawers" using metal filing drawers. Those metal drawers were too heavy and too unwieldy for me, and as I contemplated where my "Category Drawers" would go in our new home, I knew there was no spare bedroom closet for them. So, knowing they had to fit into the wall of cabinets somewhere, I knew I needed to change their container. I stumbled on these Iris Media Cases right before moving to the apartment in 2015 that are designed for DVD's, but they fit photographs very well. I reworked the contents of four metal drawers (two of two-drawer metal card catalogs) into three Iris Media Cases. On the left are four Creative Memories Power Sort boxes. I eventually want to convert their contents to the Iris Media Cases. That will be a project for another year, to be sure. {I will confess that the entire depth of this center unit was planned to accommodate the length of the Iris Media Case. As I measured all my things, this was the winner for the longest/deepest item.}

The right uppermost cabinet holds --- a big fat nothing! I found these Iris Large Document Cases - where else but at The Container Store?...Actually most Michael's also carry them and you can use a coupon....I was purely looking for a container for this size space that would hold things like 6 x 8 albums I bought and want to do, or long-term items {as in not working on anytime soon}. These types of things are currently in the garage. My plan is to pare down what is out there to what will fit inside these four cases. There is a small chance that I will swap these out for fourteen regular Iris Cases. I'm just not sure. I like having the option to use these cases and could use these four, or two of them with seven Iris Cases....Not finishing this cabinet has held me up for awhile, and I've just decided to move past it. Whatever goes up there clearly isn't something I need right now, as it's all been in the garage for seven months....

Okay, let's move over to the left bank of cabinets near the window. This section is the one that is closest to where I work at my desk, and so I was very mindful about having items in this bank of cabinets closes to me that I work with frequently, whereas it's "twin" on the right side contains the opposite - things I do not access as often. I tend to think in "zones" and wanted all like items together, or in very close proximity.


Starting at the top of the uppermost small cabinet, I have chosen to separate out all of my holiday theme paper, and accessories. This was a logical choice for me because when I work on the holidays, I work on them in large batches. And when I am not working on them, I don't need my holiday stash down in the prime real estate area. The top small cabinet shelf contains Iris Cases of themed embellishments that would be used specific to that holiday. I labeled them using leftover 13 x 19 photo paper and chose the Another Typewriter font. To the right of those Iris Cases is a Fridge Binz that holds holiday 6 x 6 paper pads. I chose the Fridge Binz that had the pull out handle at the front, and that is one side and not divided. I picked up a big stack of aqua plastic school folders at the 2016 back to school sale and a la Jennifer McGuire, I cut them up for dividers and eliminated all the previous red dividers from my organizing.

Moving down into a larger cabinet, you will find it's top shelf holds all of my holiday theme paper in the famous large Multi-Purpose Bins from The Container Store and they are stored and sorted in the chronology of the year. Left to right: Winter, Valentine's Day, Spring/Easter, July 4th, Halloween, Autumn, Thanksgiving, Christmas. I clearly do not need to buy any more Christmas paper. Two of the five bins are Christmas. ACKKK!! ;-) I envision when I get ready to scrap Christmas that I will pull down those two bins and flip through and find what I'd like to work with. Within all five bins, I have the papers sorted by manufacturer and by collection.


On the far right of the holiday paper is a small Multi Purpose Bin that hold letter size stamp sheets that need a day of reckoning, and a 3-ring notebook holds my Embossing Folder samples, another candidate for a makeover. I don't know if I'll ever cut apart those large Alpha's....This bin works great for now. These stamps are here because all of my smaller stamp sets are just below this. And I'm toying with removing my embossing samples from the 3-ring and placing them in with the folders, but then again I like being able to flip through and easily see all my options...But I have a dear friend Laura that did the most beautiful full-size embossing folder samples in dove gray, and so I may very well keep the binder as is for a quick flip, but additionally make a full size sample in gray to place in the Avery Elle envelope with the folder. Decisions, decisions! Okay, moving on! ;-)
On the second shelf in that cabinet, you will find all of my clear stamps, my dies, and my embossing folders. Using the divided Fridge Binz with handles is about the best system I've ever seen. I continually thank Jennifer McGuire for this bright idea! Converting to this system is an overwhelming but completely worthwhile endeavor. The two left divided Fridge Binz are stamps, the third one holds dies and embossing folders. To their right stands a thin Container Store Multi-Purpose Utility Bin, and it holds letter sized vellum, Neenah paper, and some 12 x 12 Fancy Pants stamp sets. That wraps up the upper cabinet section and takes us to the secretary-like cubby that is the centerpiece for each of the five cabinet units.

This cubby is the genius to me of this design, if I say so myself: I can open and fold down the door to have an extended work surface, and when done I can close the door and have it look like a normal cabinet. The fold down door measures at 36 inches off the ground, standard kitchen countertop height. When I want, I can add just under 15 feet of countertop space by opening all of these doors. I have experienced this now twice as I worked to do multiple layouts and I have to say I love having the space to spread things out. I love having some stand up work space {that is not my kitchen counter!}, and some sit down work space!!

When it came to deciding what would live in these cubbies, I tried to think of what moments in my scrapping process did I need to look at things and select things? Or what needed its own dedicated workspace when, for instance, your desk is covered in paper and you need to do something else for your project? Stamping was a clear candidate! My first cubby holds all of my ink pads, and that is why I placed the bins of stamps right above this cubby - for easy access, and to create a stamping zone. For my ink pads themselves, I deliberated long and hard, and finally went with the Stamp-n-Storage Slim Ink Pad Holder that houses 72 ink pads. I do not stamp profusely, and feel my current collection of 72 inks is quite ample for my needs. I'm not a stamper that scrapbooks, I'm a scrapbooker that {occasionally} stamps. You'll also glimpse my Sizzix Secret Stamper Tool at the back on the right, and my 12 x 12 Misti to the left of the ink pad holder - again trying to keep all like things together.


On the far right of this cubby is a spinning spice rack of paints and daubers. Just a very few - I don't use them too often. To that left you will find a Ranger spinner that holds all of my roller stamps. Between the roller stamps and my ink pads sits my WRMK Evolution. It is placed there because it needs space on either side for the platform to run through, and the plug is just behind it, for the times I want to use its motor. I can pull it straight out to use and then push it straight back. I love that it folds up and is space saving. A little OXO bin of Kirkland wipes from Costco is on standby for quick clean-up of my stamps. I love that little bin! {Thank you 3kidmama!} My trimmer also rests here because I use it all the time, and stamp so seldom. I had originally planned for my trimmer to have its own entire cubby, but that felt like a big waste of space. Putting my trimmer here sort of violates one of my rules of crowding, but since my Fiskars Procision Rotary Bypass Trimmer folds up, it stores here well enough and I feel good about the allocation of space here. {I always reserve the right to change my mind after a few long spurts of making layouts but I have tested it about four times and am pleased with its placement thus far.} ;-)

Okay. Almost through the first cabinet unit. Two sections of three drawers are below the fold down cubby. The left tower of drawers in this section are simple: journal cards and tags in the top one, 6 x 6 and 8 x 8 pads in the bottom two. Journal cards larger than 3x4 sorted by color, tags and journal circles sorted by type and color and placed in the 4 x 6 Iris photo cases, paper pads sorted by manufacturer and then alphabetically by collection. October Afternoon 8 x 8 pads are larger and are on the right side of the very bottom drawer. These OA pads have also been torn apart and are sorted by color. It works well for me this way. I want to tear apart ALL of my 6 x 6 paper pads to sort by color, but I'm wishy washy on how this would work, and more often than not I use the 6 x 6 as companion pieces to layouts with that collection, whereas I use the October Afternoon 8 x 8 sheets on their own usually....It seems to make the most sense to keep the 6 x 6 by collection. So, that's paper pads for now.


That takes us to the three center units, and I'll start with the far left one. We covered the top of these already {memorabilia and paper}, so we can start at the fold down cubby level and work our way down. I treated this center section as one big section, so I'm going to share multiple drawers at once. {I did this simply to help me keep up where everything goes!} ;-) Again, these cubbies close to me should hold things I use often, and things that need a little work surface. This first section is for embellishments that are theme related, but not holiday related: school, birthday, spring, etc. These are stored in The Container Store's Project Cases. I bought these back in 2009 when I worked my way through a 29 week organization challenge hosted by a Pea, Wookiemouse. They have discontinued these cases and that makes me hold on to mine tightly. Iris makes a similar but somewhat less appealing product: their Iris Portable Project Case. There is also a big bin of basic patterned paper in various monochromatic dots and stripes stored in another Multi-Purpose bin. This is the hybrid of cardstock and patterned paper, and I keep it separate to pull to match to collection patterned papers for projects. An Iris medium Document Case holds all of my Travel embellishments. It's larger than the project case, and holds Summer and Travel. I am working on a Die Cut 3-ring binder and a Chipboard Chip 3-ring binder. When those are done, they will live in this cubby with these project cases.

The second cubby holds my sticker binders. I have six currently. Binders one and two hold my sticker sheets that are less than 12 x 12, like all of the October Afternoon sticker sheets that were companions to their paper collection. One of these binders holds stickers that are more blank than not. I call these journaling stickers. The second one holds stickers that are more decorative and have phrases on them. I call these - wait for it - phrase stickers. ;-) The next two binders hold full size 12 x 12 sticker sheets from collections. I store my 12 x 12 sticker sheets in 3-ring albums and use scrapbook page protectors for the sleeves. I have these sorted alphabetically by the name of the collection. Why? If I'm working with a certain paper, I obviously know the name of that collection.

So, if I need, for instance, the sticker sheet that goes with the Carta Bella Toy Box collection, I would grab the binder that is labeled K-Z and flip back to the T section. It is how I work. The key for you is knowing how YOU work. The fifth binder is like the third and fourth, but it is my holiday collections that I've segregated, just like I have segregated the paper collections. Again, I don't want to be flipping through Christmas if I'm working on random May photos. The sixth 3-ring binder holds 12 x 12 Alphabet Stickers that are completely and only alphabet letters. {Think all of the old October Afternoon sticker sheets.} There is also a Fridge Binz that holds all of my small alphabet stickers. My goal here was to get all of my stickers in one place.
To make adding sticker sheets easy, I put one collection's set in one sleeve. The decorative element sheet is on the right sleeve, and the alpha sheet that matches it would be behind it. You can see below the sticker sheets of two collections on one binder opening. This is a bit unnerving, but the trade-off is good when considering ease of putting new things away. Also, I use the shapes more than the letters, so that drove what went on "top" for me...


The third cubby, the second one away from the right wall, holds something that I want easy access to, but that I don't necessarily use all at one time. It holds - don't judge - ;-) all of my Disney supplies: paper, small paper pads, embellishments (washi, brads, die cuts, stickers). I also have two multi-layout Disney kits from Scrapbook Generation in this cubby. All of my Disney stuff is right here. I tend to work on Disney pages in spurts and wanted it all grouped together. My hope now that my room is settled is to really crank out some Disney pages. I have so many amazing photos I want to scrap. I have 3 Multi Purpose Bins on hand to rework the papers and projects out of stacked Iris Cases into those bins that are more accessible. I need to tidy this up though and that's for another weekend soon. This should execute fairly quickly; this is just one more project that I could have held up this blog post for, but decided to press on regardless. Repeat with me: perfection is overrated! ;-)

Staying in the three unit center of the cabinet wall, the top two rows of drawers hold punches. Yep. Six drawers of punches. I love them. I use them. I lament that they are no longer really made. My mantra for this room, remember, is easy access, no crowding. So, my border punches are in the three drawers on top. My shape punches are below them. I can see all of my punches very quickly and easily. After I grab a punch, I can punch it right there on the fold down door, and then put the punch away. It's a very accommodating placement.


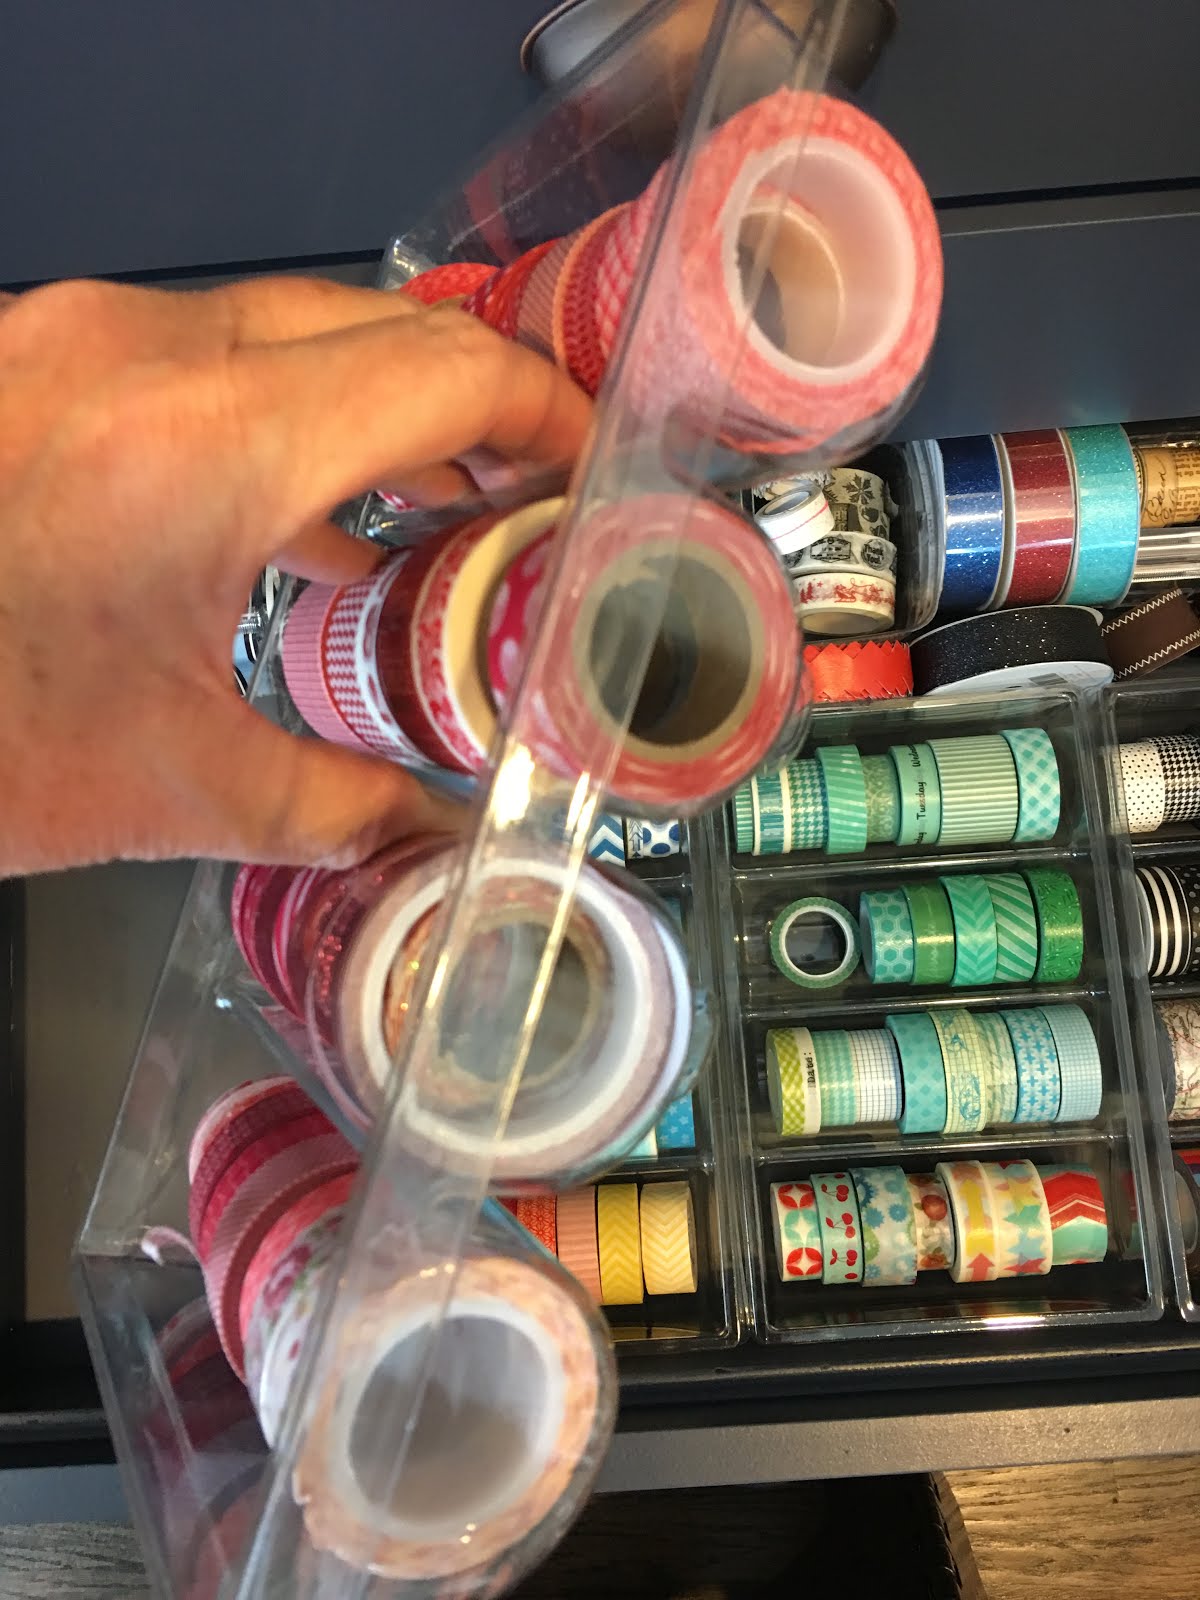
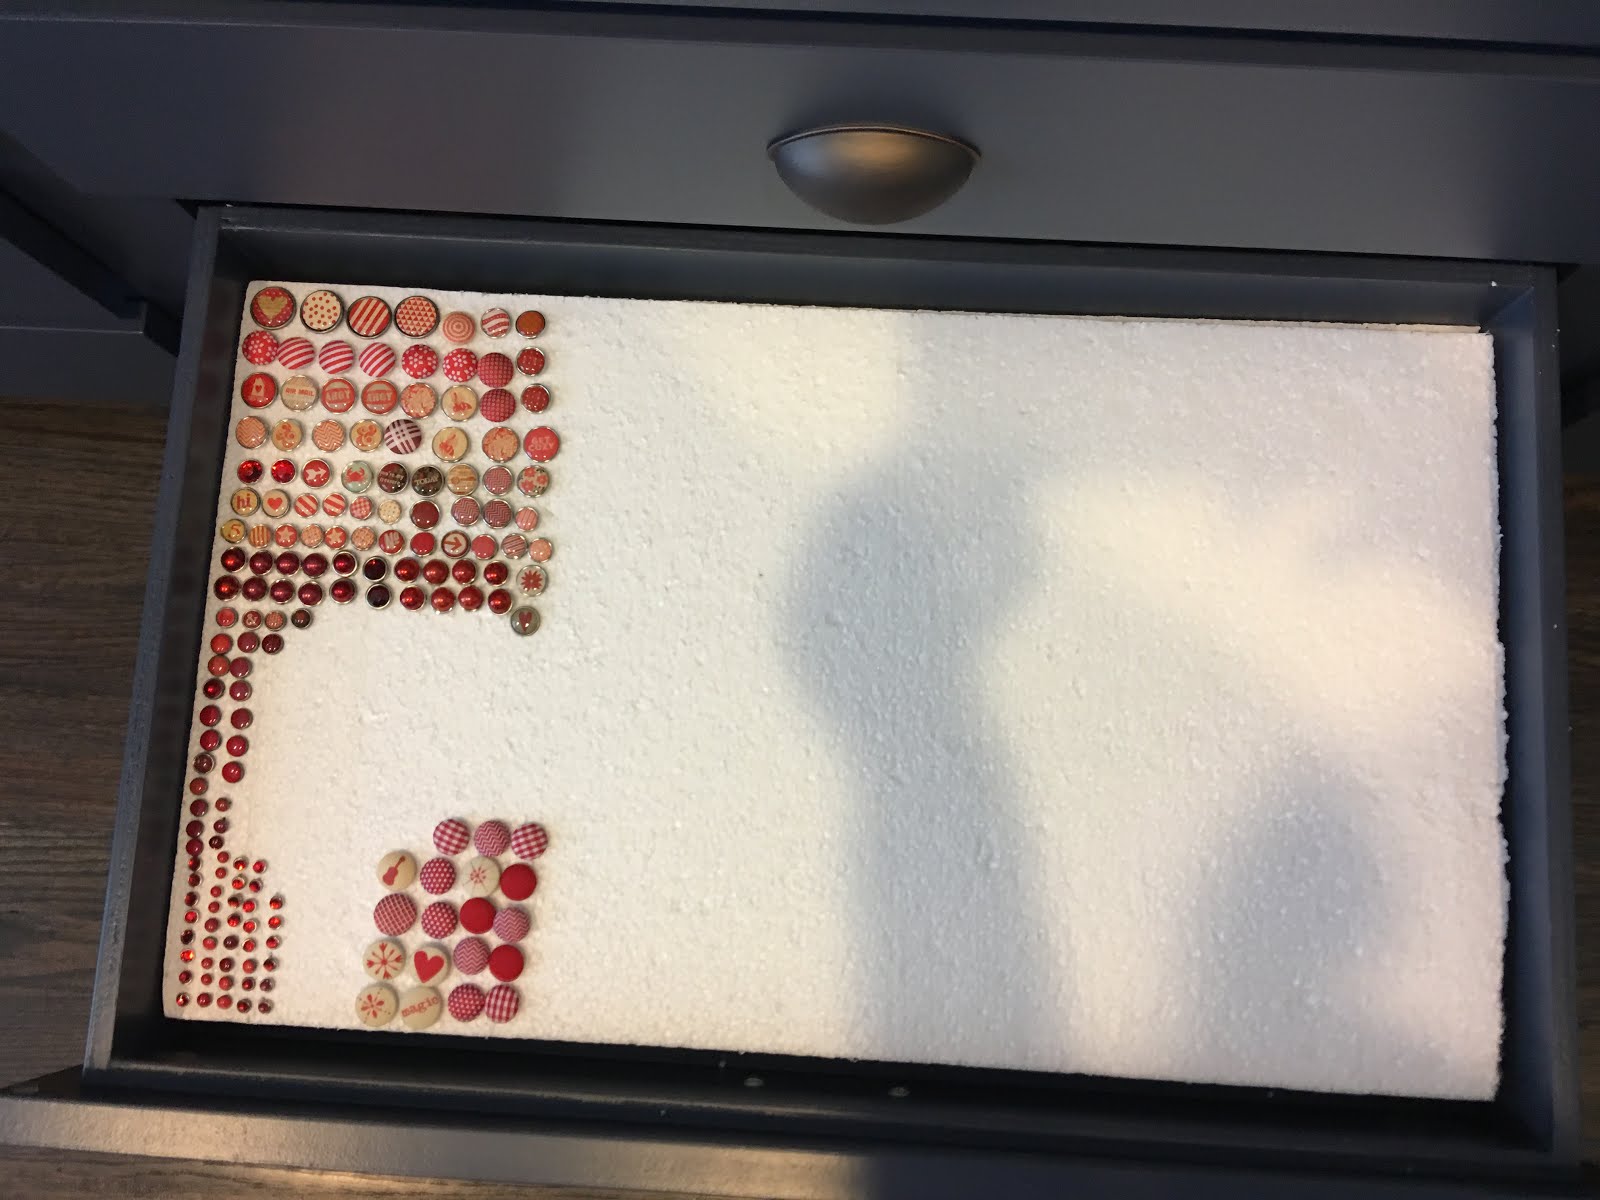
There are fifteen shallow drawers in this center section. The punches take six. The remaining nine hold various small embellishments: enamel dots, washi tape, veneer, decorative brads, metal brads, buttons, flair, chipboard, and miscellaneous things like Maya Road sheers, little felt things, metal embellishments, and ephemera... These nine drawers TOOK. THE. MOST. TIME. to organize because I needed to match the size of the drawer, and I needed to change in many instances how these embellishment collections were sorted. I worked long and hard to make all of these categories sorted by color. But, I think that should really pay off because when I go to finish up a page, I am looking for certain colors to pop out. Opening these drawers up and seeing all the rainbows of color makes me super happy. You'll see enamel dots, bling, veneer, brads, flair, washi tape, chipboard - a rainbow of choices!


And just like that, we are to the far right and final cabinet unit. This entire unit houses things that I don't use very often, with one exception: my typewriter.
The top shelf of this holds six Iris cases that hold various projects that are ongoing and use distinctive collections. To the right of the Iris cases is a good find that was the result of maybe my fifth trip to The Container Store - their Tall Shoe Box. It's dimensions were perfect for this space, and the amounts of flowers and ribbons I have. The top one holds all of my flowers that may come back in some day. ;-)
The second shelf holds Bigso Stockholm Paper Drawers that I use to store the boys' school photos, 5 x 7's, and 8 x 10's. There's a drawer for each son, one for family, and one for Heritage photos. This is part of Stacy Julian's Library of Memories system. The three Tall Shoe Boxes to the right of that hold twine and ribbons: neutral, warm, and cool color assortments. A few sugar dispensers from Walmart hold my larger spools of twine. You can see the blue one. Red and brown are behind it.
The third shelf holds my Pioneer 3-Up Photo Albums, another key feature of Stacy Julian's Library of Memories. Having a shelf tall enough for these albums as another MUST HAVE in my room design. These albums hold the prints of photos I want to scrap from 2009-2014. I have 1/2 of 2015 printed and holding in an Iris photo keeper, and I haven't printed in bulk my 2016 photos. Yes, I'm behind, but believe me, I've got plenty to do! The little labels on these binders are temporary, and that is why they aren't fancy. The idea is that you are constantly emptying one album and filling another up. Years ago, I got my albums at Costco online. They are a little bit harder to find now. Look for 3-rings and not spirals.


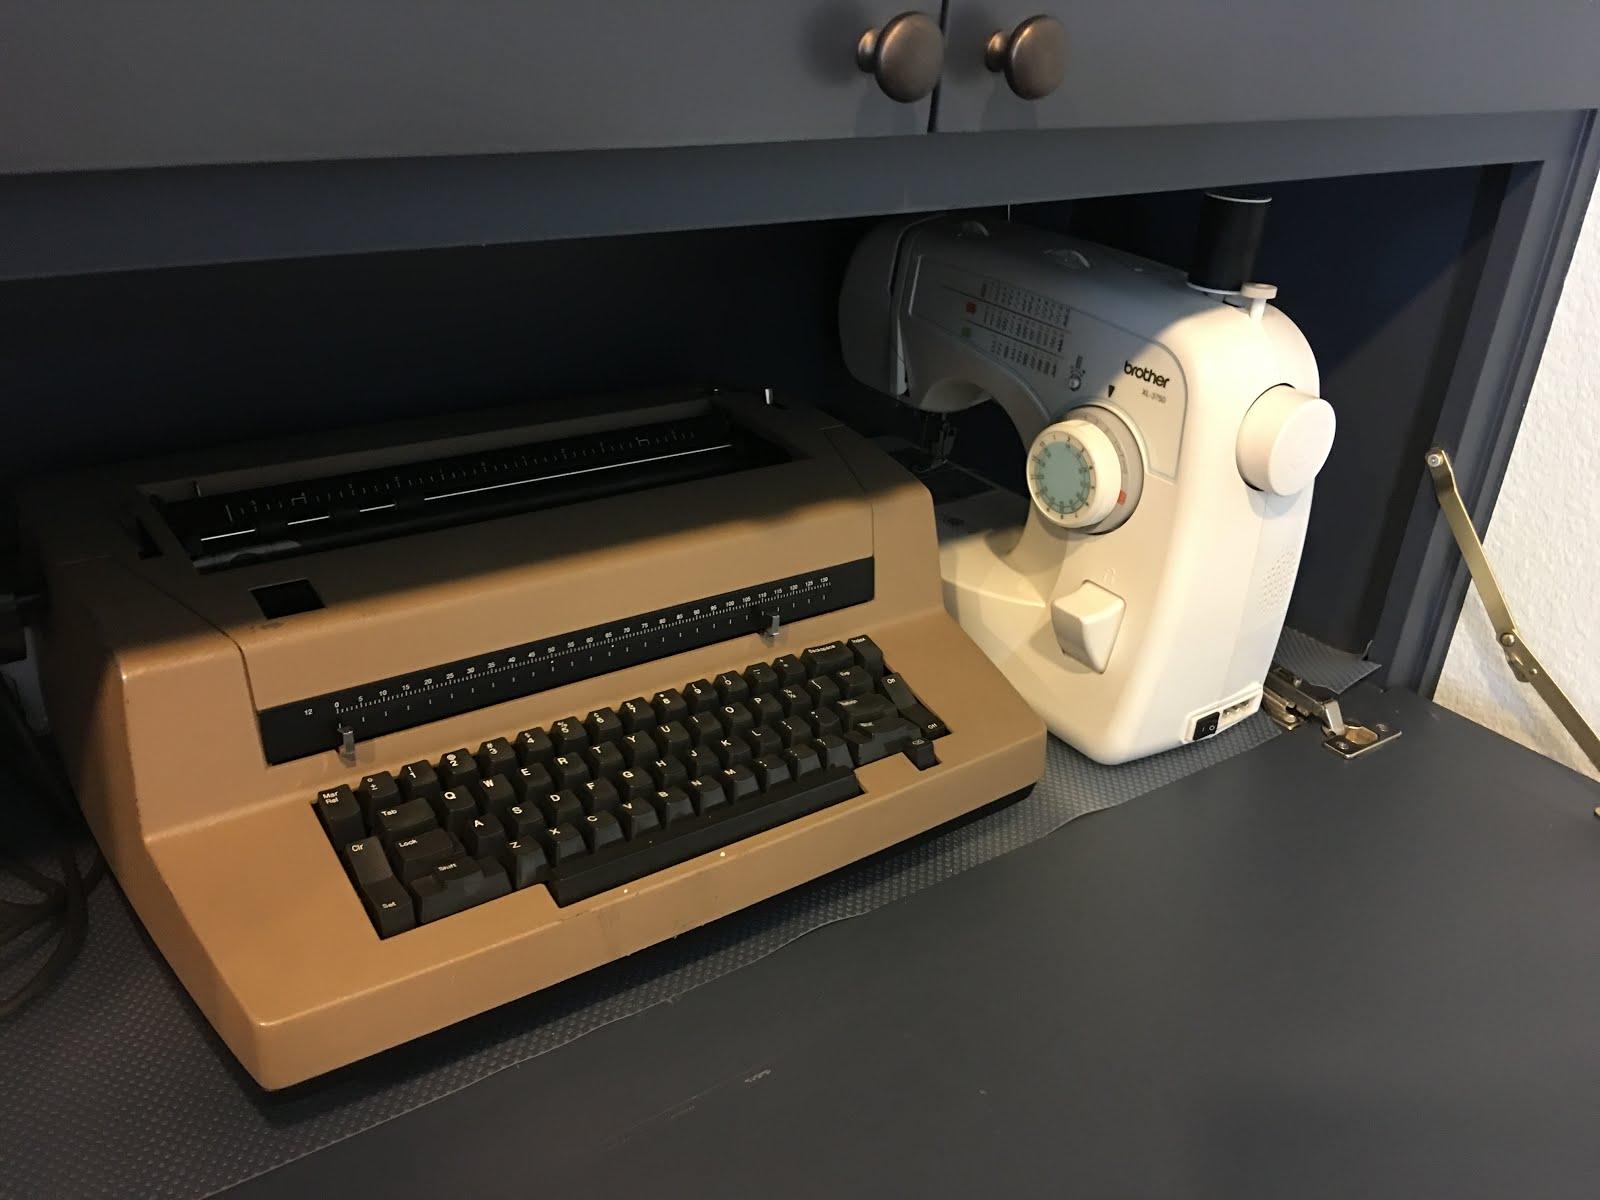
The cubby in this unit holds my typewriter and since the fold down door is at counter top height, I can just pull the typewriter out, type right here, and then slide it back. There is a plug in the far left and the far right cubbies, and the plug is what dictated the typewriter's placement here. Now, this little jewel is like my new favorite thing. I walk at lunch in the warehouse and passed for over a year an IBM Selectric, sitting abandoned. I finally asked about it, and was given it free! I paid $85 to get it serviced and I. ADORE. IT. It's the typewriter I've been looking for! I have two now to get rid of. I've already sold my vintage Royal. It is also wonderful to pare down on the typewriters. This IBM gives me the ease of electric and correcting, and marries that convenience with the vintage feel, based on the ball elements I use. Okay. Enough gushing. My sewing machine also is in this cubby, again for the plug access. On both of these items, I wanted to be able to easily use them if I want/need to. I do hope to use my machine more. Having it out and accessible I hope will do the trick.
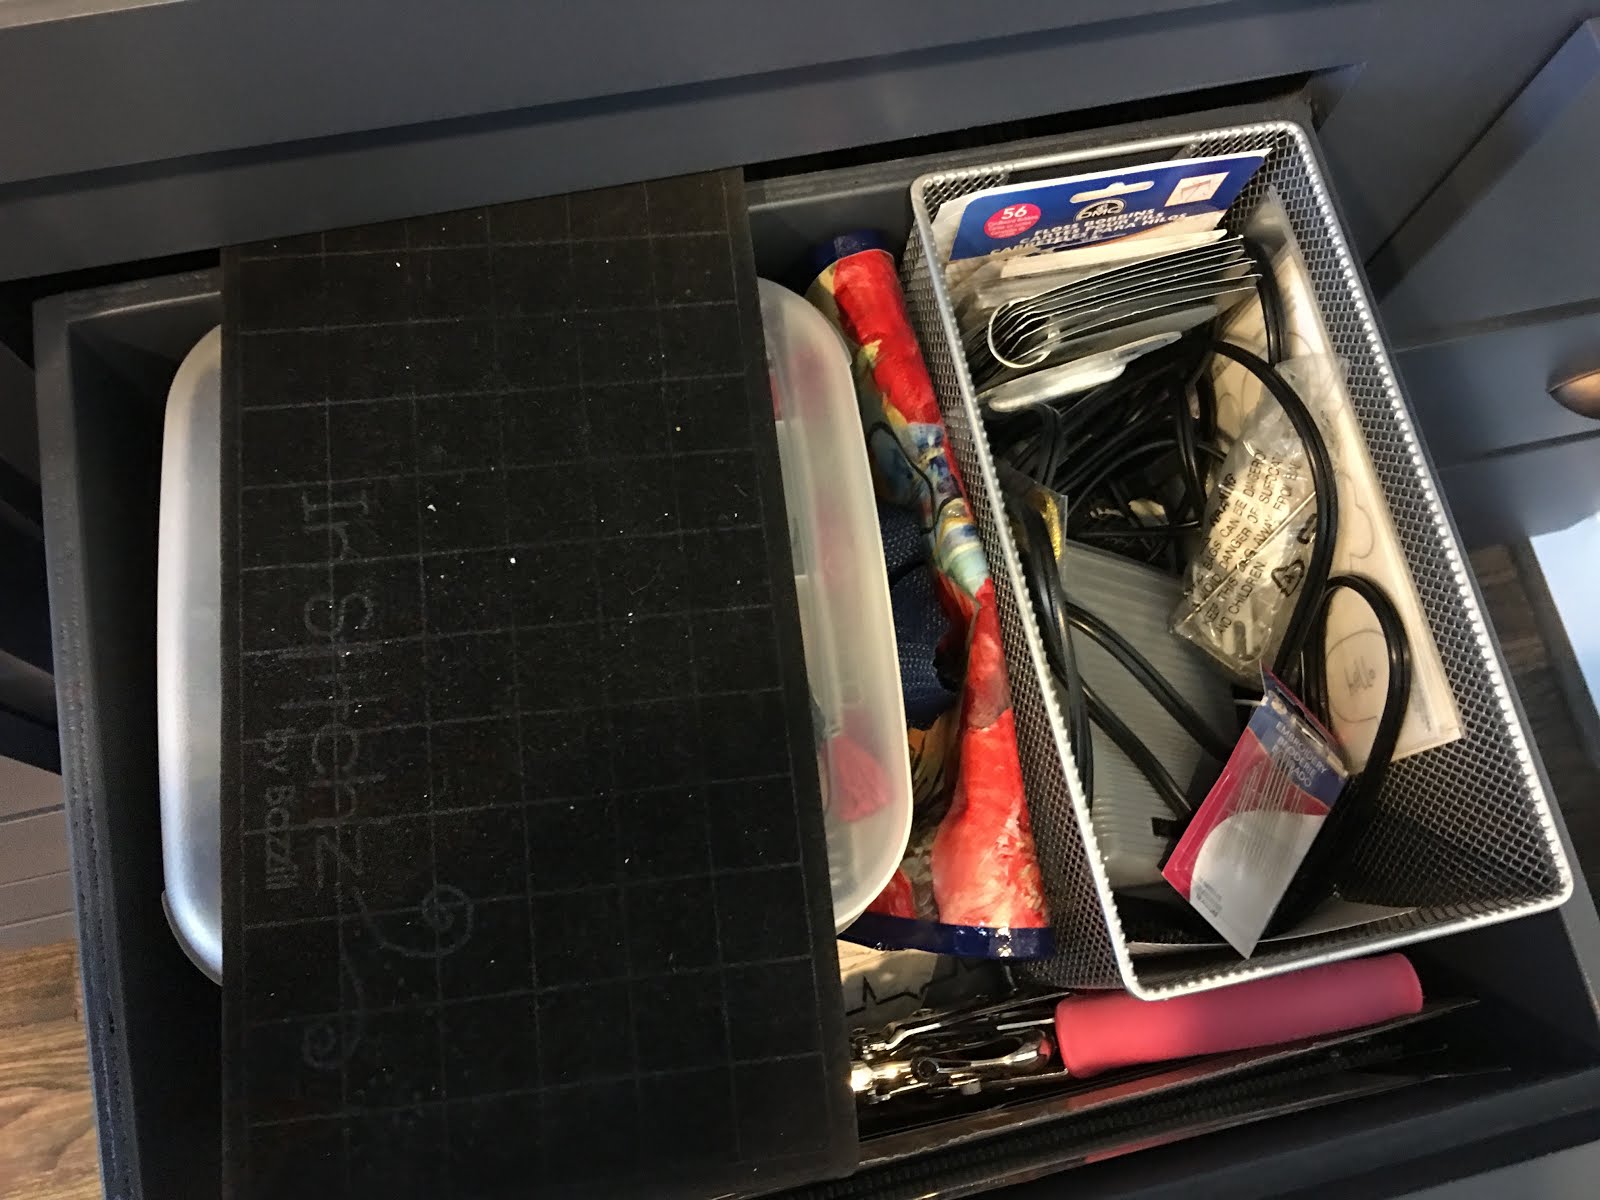
And that takes us down to the last two units of drawers. Keeping my sewing things together, I put all of my thread and hand sewing tools in the top drawer of the left tower. {This unit is symmetrical to the far left unit, so there are two towers of drawers in this unit also. I'm working down the left tower now, which has four drawers.} Second drawer: Thickers. Easy peasy. They fit perfectly. Sorted by color and placed in the 6 x 12 Ziploc bags to ensure they stay closed and are easily accessed. I don't use these a lot, I don't buy them a lot, and it's because I use my Cameo so much and sort of think Thickers can get expensive. The third drawer currently holds Rub-Ons. When, if ever, I finish my Die Cut Binder, I may convert these to a 3-ring notebook and put them up near my sticker binders, or up near my project cases. They are not used much. Part of that is because I cannot see them. I'd like to use them, so I know I need to get them organized and easily visible. {This whole process has been a huge exercise in thinking about how I work, how I reach for things, what is working, what isn't...} For now, they are dumped here. The fourth drawer is another dump: miscellaneous card supplies. I don't make cards that often. I have the two bottom drawers over here relegated to card supplies. I need to purge, organize, and then use the stuff.


The cardmaking supplies have kind of held me up. I wanted to roll out a perfect room. Guess what? Mary Poppins never showed up! So, I tried my best for "Spit Spot", and fell just a tad short of perfection. The road to get here was full of many hours of moving things, purging things, sorting things, reorganizing things, cataloging things in Evernote. I've sort of done the 2009 Wookiemouse Challenge again! ;-) I've gone through everything and this room started out completely empty. I decided it's time to consider it done: roll out the room introduction, defer any unfinished organizing, and dive into making layouts. It's been my joy to get to this point in the room, and I feel an ever greater sense of joy as I contemplate now crafting the good story I love.
I've had so much fun sharing with you my new Story Central on this "Fifty Cent Tour". Thanks for tagging along with me on this launching of a new chapter!


You put such exceptional planning into this. Now you can enjoy the fruits of your labour!
ReplyDeleteThank you! I do feel very blessed and blissful when in this room! So glad it's all behind me!
ReplyDelete